Casting Plaster for Lost Wax, Part 5 - Casting in Cardboard
In my last post I discussed the option available for cutting down on waste and time when making my plaster cores for the lost wax technique.
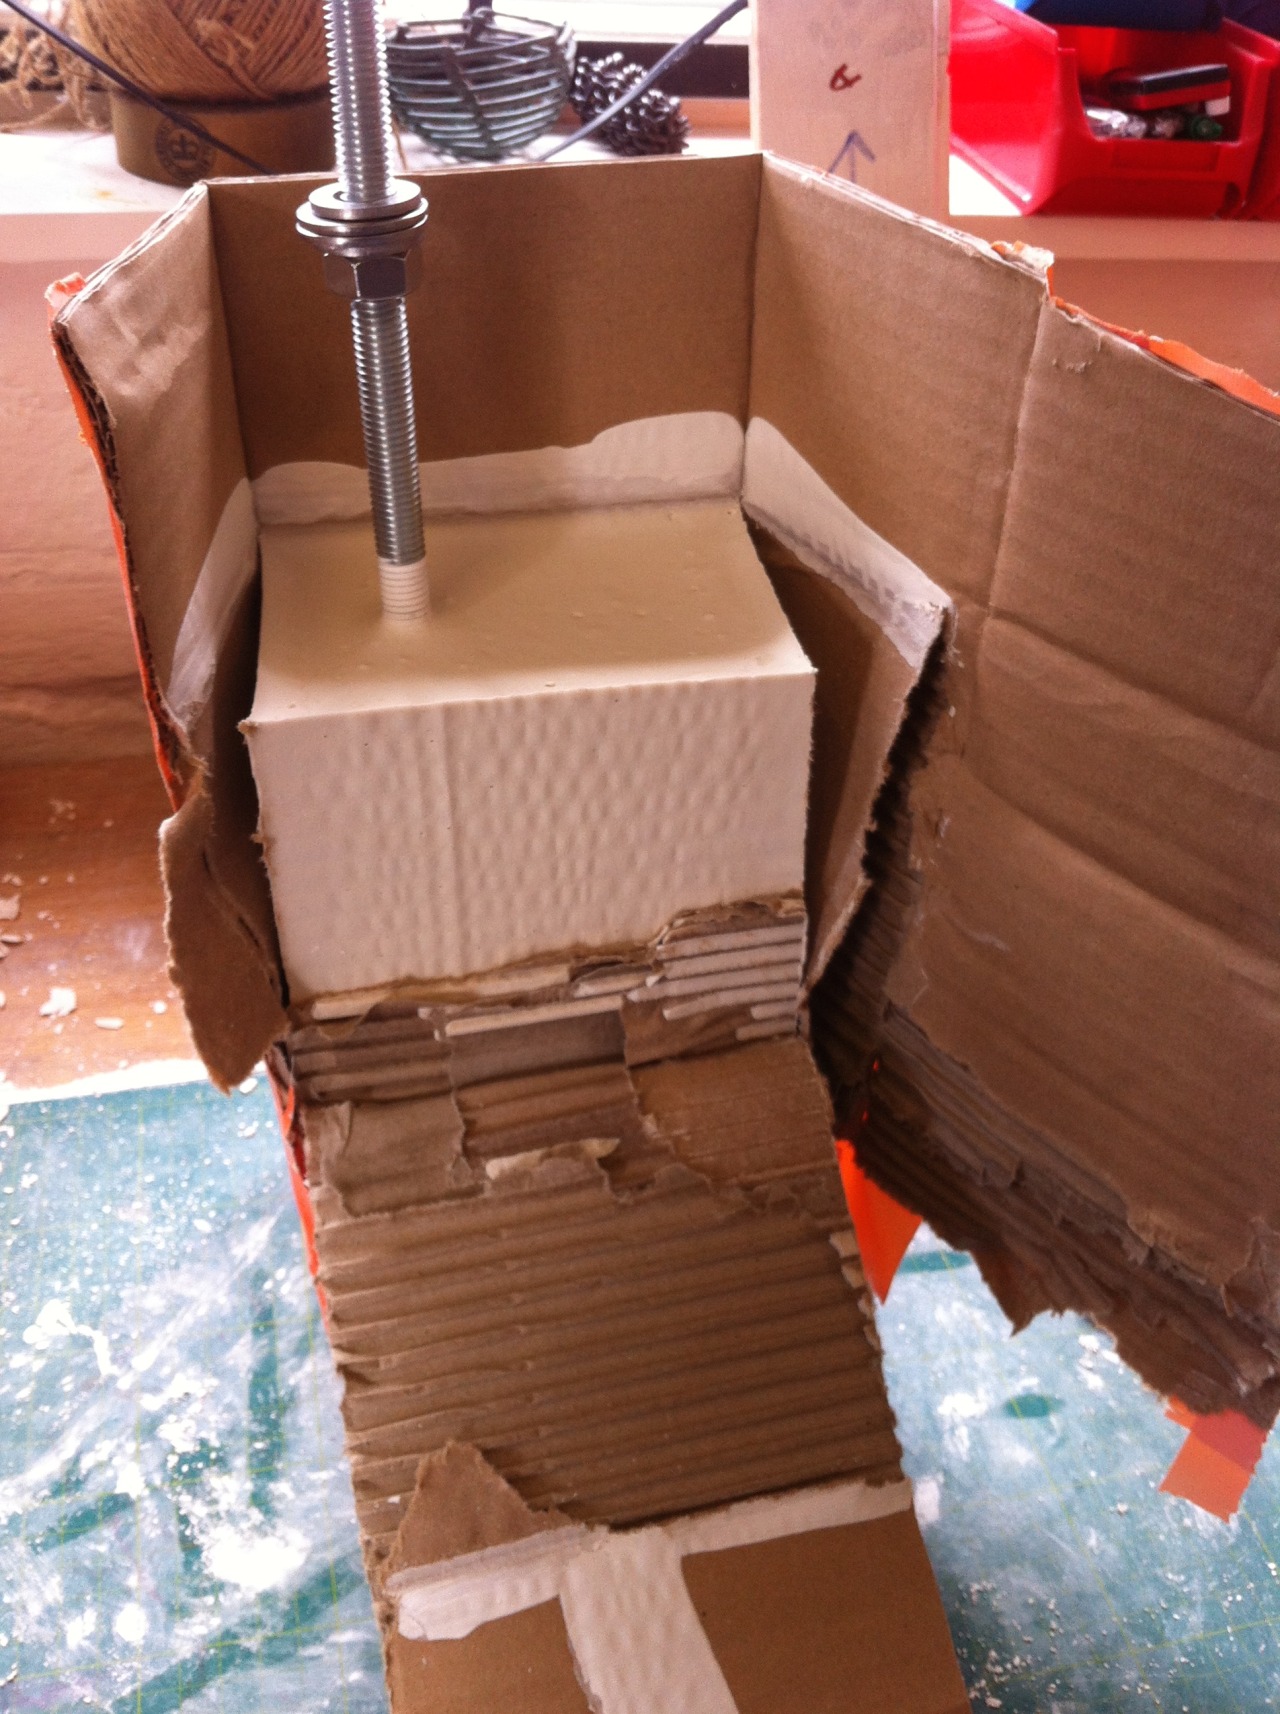
This is the results of trying out casting in cardboard worked extremely well. The cardboard was cut into the rough shape I required and held together with tape. To ensure the seems were strong I reinforced them with duct tape, also along every edge and across the base, anywhere I felt could be a weak spot.
Next the card board vessels were nestled into the casting bucket and foam placed around the outside to hold the cardboard still. The plaster was fixed and poured into the card, so far so good. Over to the vibrating, this was the the part that has caused other ideas to fail, and this time it worked. The foam kept the card vessels securely in place whilst the vibrating worked all the bubbles put the surface.
After 5 minutes of vibrating the metal arms were fitted and the plaster left to set and cure for 2 hours.
After the cure time, the cardboard easily ripped away as it was still damp from the plaster, then a quick shape and the plaster core’s were ready for the final carving.
This method has cut out a lot of lengthy carving and reduced on waste, a good result.


